Docker Essentials: From Installation to Custom Images
Learn Docker basics, build custom images, and deploy containerized apps with ease.

A few weeks ago, I began my DevOps journey through the DevOps Mastery Specialization on Coursera by KodeKloud—a fantastic starting point for anyone new to this field. Last week, I published a blog post on Jenkins, where I covered its installation, initial setup, and how to create a basic pipeline. In this blog, I’ll be diving into another essential DevOps tool—Docker. I’ll walk through the installation process, introduce commonly used commands, demonstrate how to create a custom Docker image, and explain how to push it to remote repositories like Docker Hub.
Content
- Introduction
- Installing Docker
- Key Concepts
- Basic Docker Commands
- Creating a Custom Docker Image
- Running the Custom Image
- Creating a multistage Dockerfile
- Tagging and Pushing to Docker Hub
- Common Issues and Troubleshooting
- Conclusion
- References / Resources
Introduction
What is Docker?
Docker is an open-source platform that enables developers to build, package, deploy, and manage applications using containers. It provides a consistent environment by packaging an application along with all its dependencies into a single unit called a Docker image. This image can then be used to run containers—lightweight, isolated instances of applications that behave the same way across different systems.
Unlike traditional deployments where dependencies must be installed manually on each machine, Docker ensures everything the application needs (libraries, runtime, environment variables, etc.) is already included within the image, eliminating “it works on my machine” problems.
Why Use Docker?
Lightweight and Efficient: Containers are much more lightweight than virtual machines. While VMs simulate an entire operating system along with hardware through a hypervisor, Docker containers share the host OS kernel and only run the necessary libraries and binaries. For example, if you run a container using an Ubuntu base image, it won’t have systemctl or systemd since it’s designed to run just a single isolated process—not an entire OS.
Portability: Docker containers can run on any system that supports Docker—whether it’s Linux, macOS, Windows, or a cloud provider. This allows developers to write code once and run it anywhere without worrying about environment inconsistencies.
Speed and Scalability: Because containers are lightweight and don’t require booting up an entire OS, they start almost instantly. Developers can spin up multiple instances of an application in seconds, which is ideal for scaling.
Version Control and Rollback: Docker tracks versions of images, making it easy to roll back to previous builds. This is especially useful in CI/CD pipelines where consistency and control are crucial.
Ecosystem and Community: Docker has a vast open-source ecosystem. Developers can access Docker Hub—a public registry with thousands of pre-built container images contributed by the community and official sources.
Real-World use cases
- Microservices architecture: Run isolated services for better scalability and maintainability.
- Reproducible development environments: Mirror production to avoid “it works on my machine” problems.
- CI/CD pipelines: Automate builds, tests, and deployments in containerized workflows.
- Cloud-native apps: Deploy seamlessly across AWS, Azure, or GCP.
- Legacy app modernization: Wrap legacy software in containers for portability and ease of management.
Installing Docker
Linux (Ubuntu - Preferred)
For Ubuntu, you only need to install the Docker Engine, as the Linux kernel natively supports containerization. Below are the recommended steps to install Docker using Docker’s official APT repository:
Step 1: Set up the Docker APT Repository
1
2
3
4
5
6
7
8
9
10
11
12
13
14
15
16
17
18
19
# Update package index and install required packages
sudo apt-get update
sudo apt-get install ca-certificates curl

# Create directory for Docker's GPG key
sudo install -m 0755 -d /etc/apt/keyrings

# Download and store Docker's official GPG key
sudo curl -fsSL https://download.docker.com/linux/ubuntu/gpg -o /etc/apt/keyrings/docker.asc
sudo chmod a+r /etc/apt/keyrings/docker.asc

# Add the Docker's repository to Apt sources:
echo \
  "deb [arch=$(dpkg --print-architecture) signed-by=/etc/apt/keyrings/docker.asc] https://download.docker.com/linux/ubuntu \
  $(. /etc/os-release && echo "${UBUNTU_CODENAME:-$VERSION_CODENAME}") stable" | \
  sudo tee /etc/apt/sources.list.d/docker.list > /dev/null

# Update package index again
sudo apt-get update
Step 2: Install Docker
1
sudo apt-get install docker-ce docker-ce-cli containerd.io docker-buildx-plugin docker-compose-plugin
Step 3: Verify Docker Installation
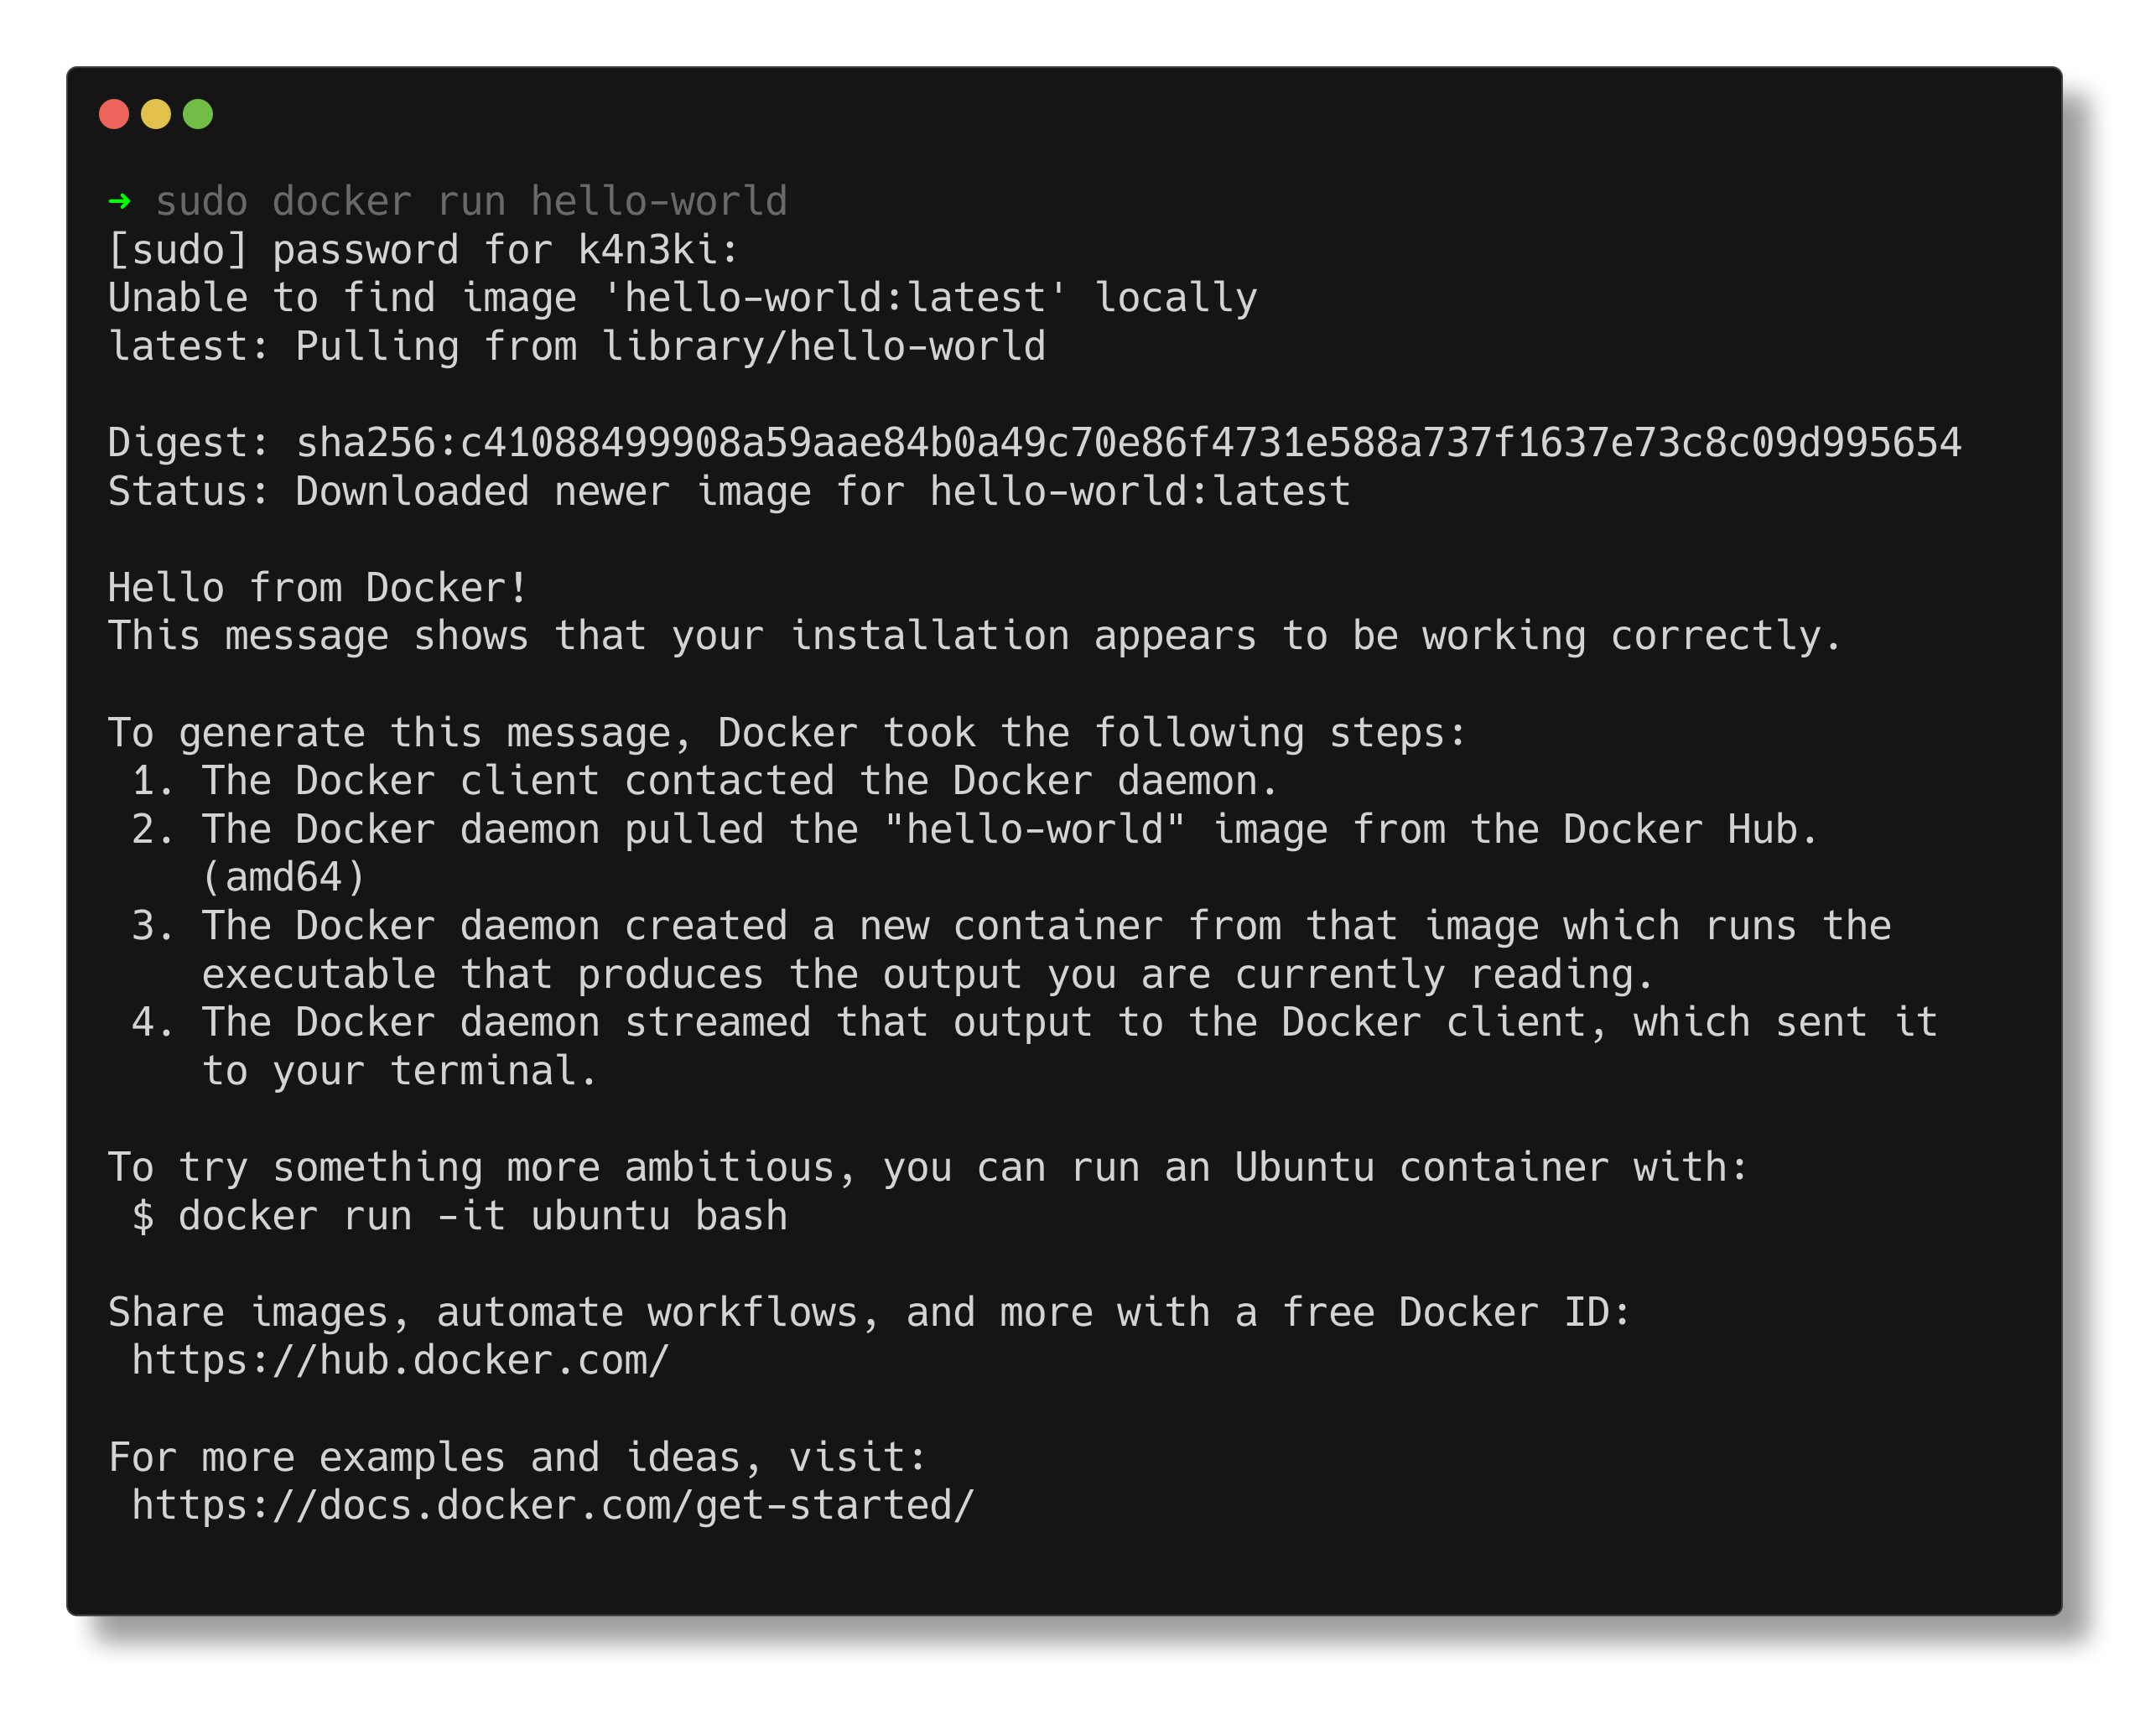
Run the official hello-world container to verify that Docker is installed correctly:
1
sudo docker run hello-world
If everything is working, you’ll see a message confirming that Docker is set up correctly.
Windows & macOS
Unlike Linux, Windows and macOS do not have a native Linux kernel, which Docker relies on. Therefore, Docker runs inside a lightweight virtual machine using:
- WSL2 (Windows Subsystem for Linux 2) on Windows
- HyperKit on macOS
To install Docker on these platforms:
- Download Docker Desktop from the official site: https://docs.docker.com/desktop/
- Follow the installation instructions specific to your OS.
- After installation, verify it by opening a terminal (or PowerShell) and running:
1
docker run hello-world
Docker Desktop comes bundled with everything needed, including the Docker Engine, Docker CLI, and Docker Compose plugin.
Key Concepts
Image vs Container
Image: </br> A Docker image is a lightweight, standalone, and immutable template used to create containers. Think of it like a virtual machine snapshot or blueprint. It includes everything needed to run an application—code, runtime, libraries, environment variables, and configuration files.
Container: </br> A container is a running instance of an image. It is an isolated environment that runs a set of processes with its own filesystem, networking, and resources—created from a Docker image. Multiple containers can be spun up from the same image, each running independently.
Docker Engine
Docker Engine is the core component that enables containerization. It is an open-source container runtime that acts as a client-server application with three main components:
- dockerd (Daemon): A long-running background process responsible for managing containers, images, volumes, and networks.
- REST API: Provides programmatic access to Docker’s features, allowing tools and scripts to interact with the daemon.
- Docker CLI (docker): A command-line interface that sends commands to the Docker daemon using the REST API.
Docker Hub
Docker Hub is a cloud-based container registry where developers can store, share, and manage Docker images. It hosts both public and private repositories. You can:
- Pull pre-built images from official sources or community contributors.
- Push your own custom images for versioning or sharing with teams.
Dockerfile
A Dockerfile is a script-like text file that defines the steps to build a Docker image. It acts as a blueprint for the image, specifying:
- The base image to start from
- Files to copy
- Packages to install
- Commands to run
- Default working directory and entry point
By running docker build on a directory with a Dockerfile, Docker constructs a new image as per the instructions.
Volumes
Volumes are Docker’s preferred mechanism for persisting data generated and used by containers. Unlike the container’s writable layer (which is ephemeral), volumes are stored on the host filesystem—typically at /var/lib/docker/volumes on Linux.
Key benefits:
- Data persists across container restarts and removals
- Volumes can be shared across multiple containers
- They’re managed entirely by Docker and are more efficient than using bind mounts for production use
Basic Docker Commands
docker run
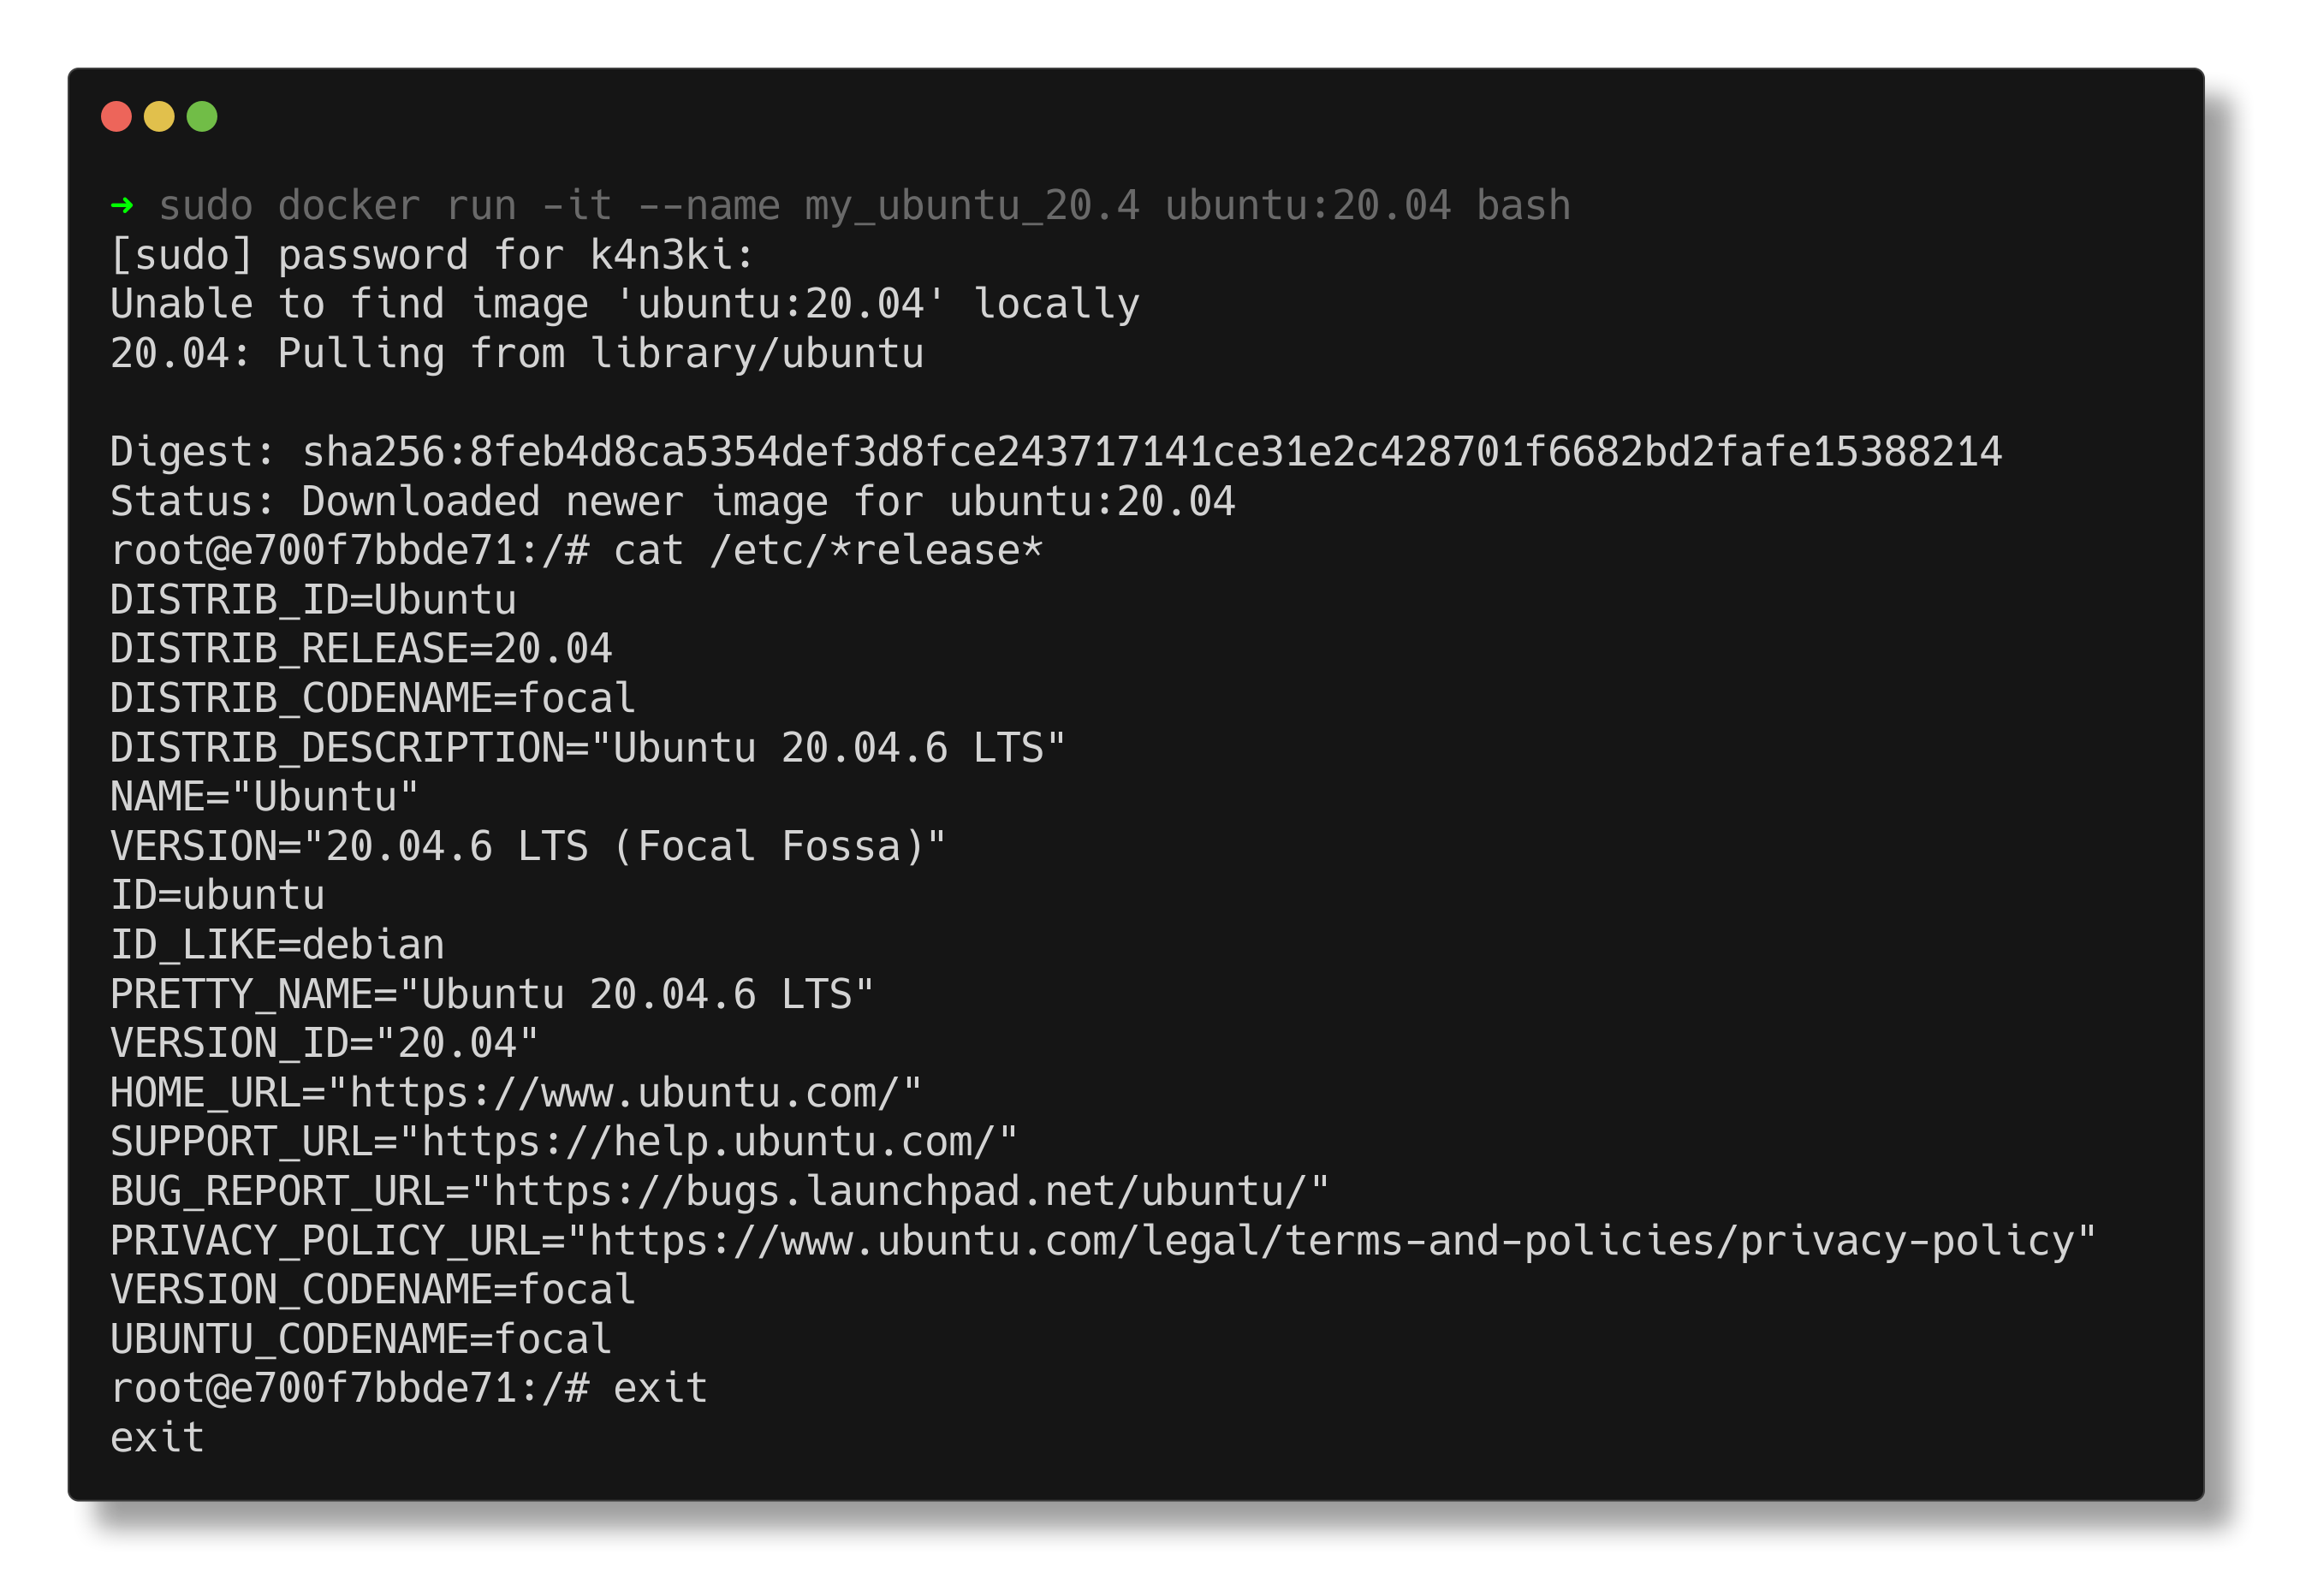
The docker run command is used to create and start a new container. It first checks if the specified image exists locally. If not, Docker automatically pulls the image from Docker Hub.
In the example below, the command runs an Ubuntu 20.04 container with bash:
1
docker run -it --name my_ubuntu_container ubuntu:20.04 bash
-i: Runs the container in interactive mode.-t: Allocates a pseudo-TTY for the container, giving it terminal access.--name: Assigns a custom name to the container; otherwise, Docker generates a random name.-d: (Optional) Runs the container in detached mode (in the background).
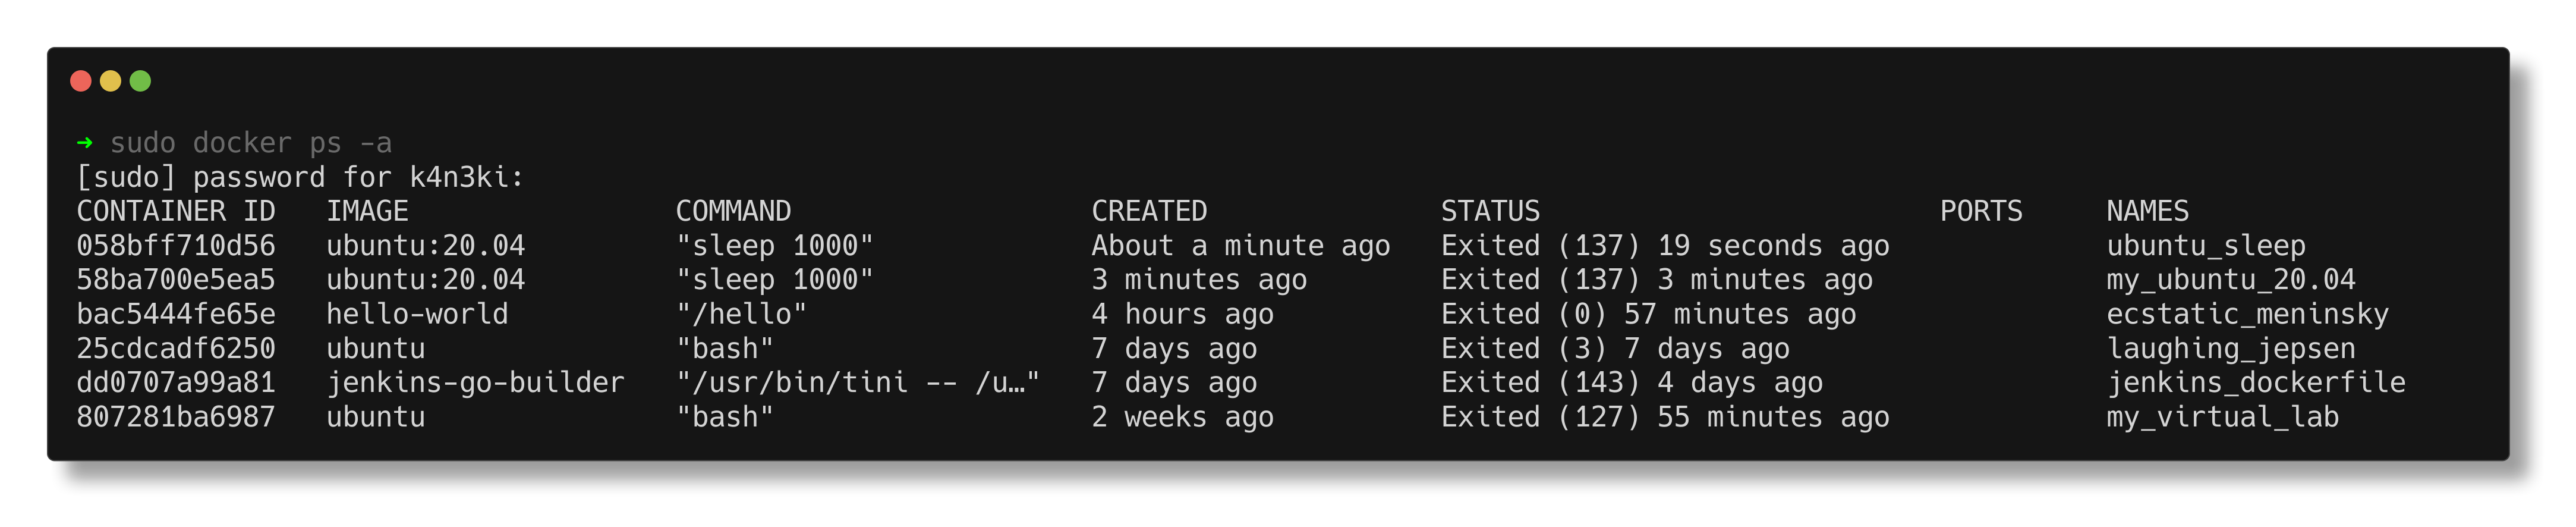
docker ps -a
docker ps: Lists only running containers.docker ps -a: Lists all containers, including stopped (exited) ones.
The output includes:
- Container ID: Used to reference the container in other commands.
- Image: The image used to create the container.
- Command: The process running inside the container.
- Name: The container’s unique name.

docker stop
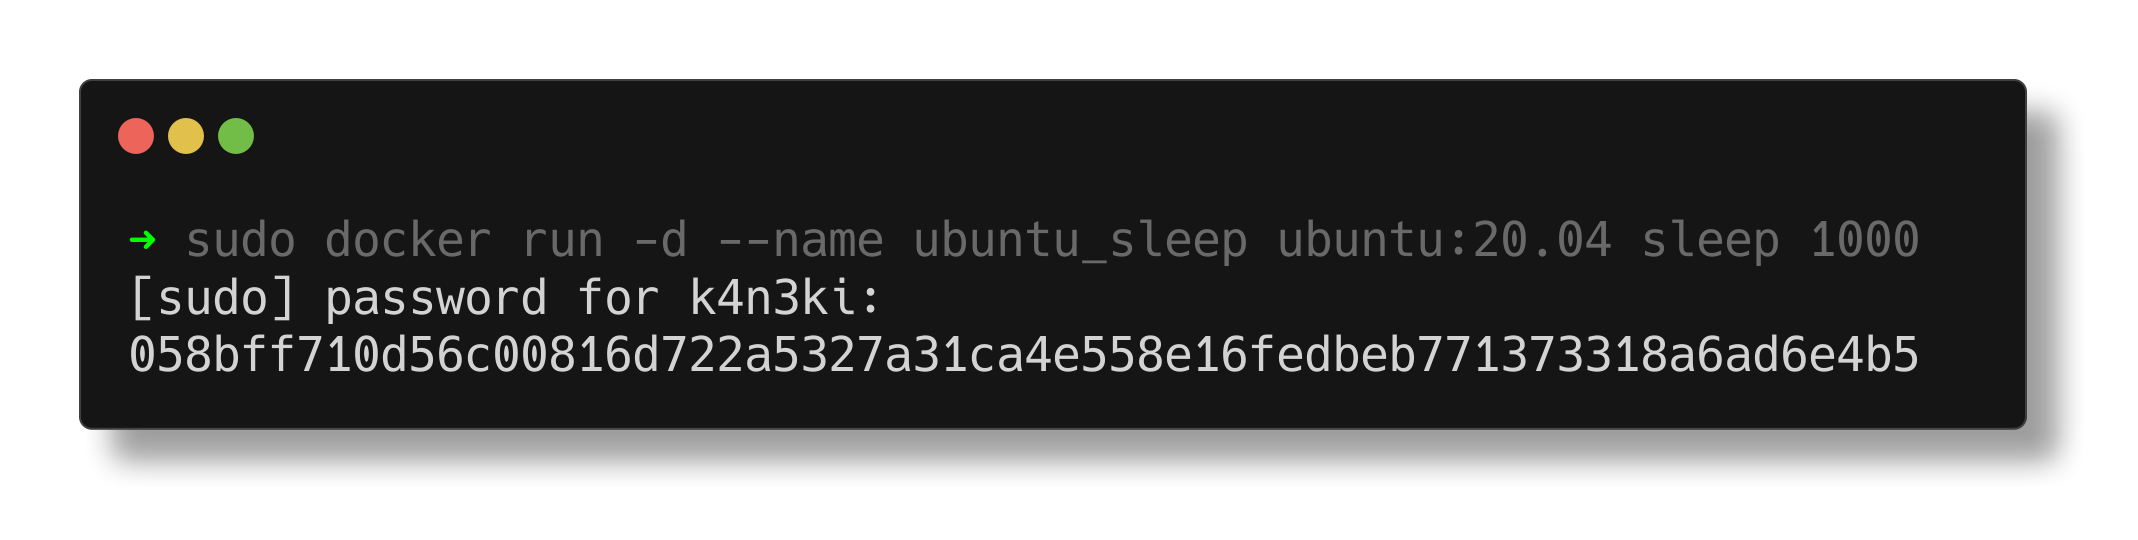
The docker stop command stops a running container by gracefully shutting down its main process.
In the example below, a container runs Ubuntu with a sleep 1000 command in detached mode:
1
docker run -d --name ubuntu_sleep ubuntu:20.04 sleep 1000
We can confirm it’s running with:
1
docker ps

To stop it:
1
docker stop ubuntu_sleep
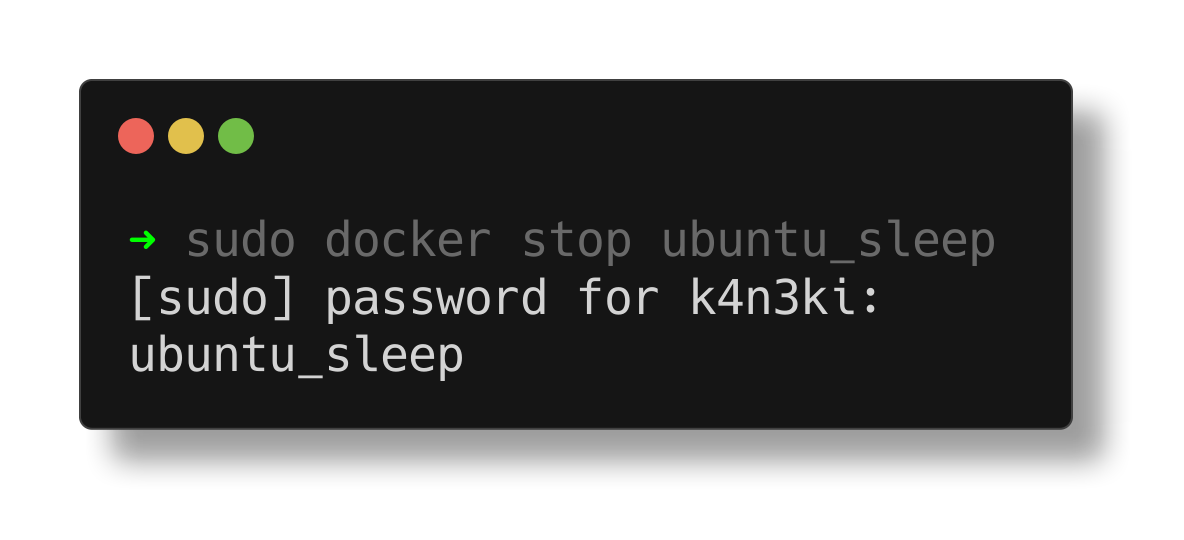
After stopping, docker ps -a shows the container’s status as Exited:
docker start
The docker start command is used to restart a stopped (exited) container. It uses the container’s name or ID.
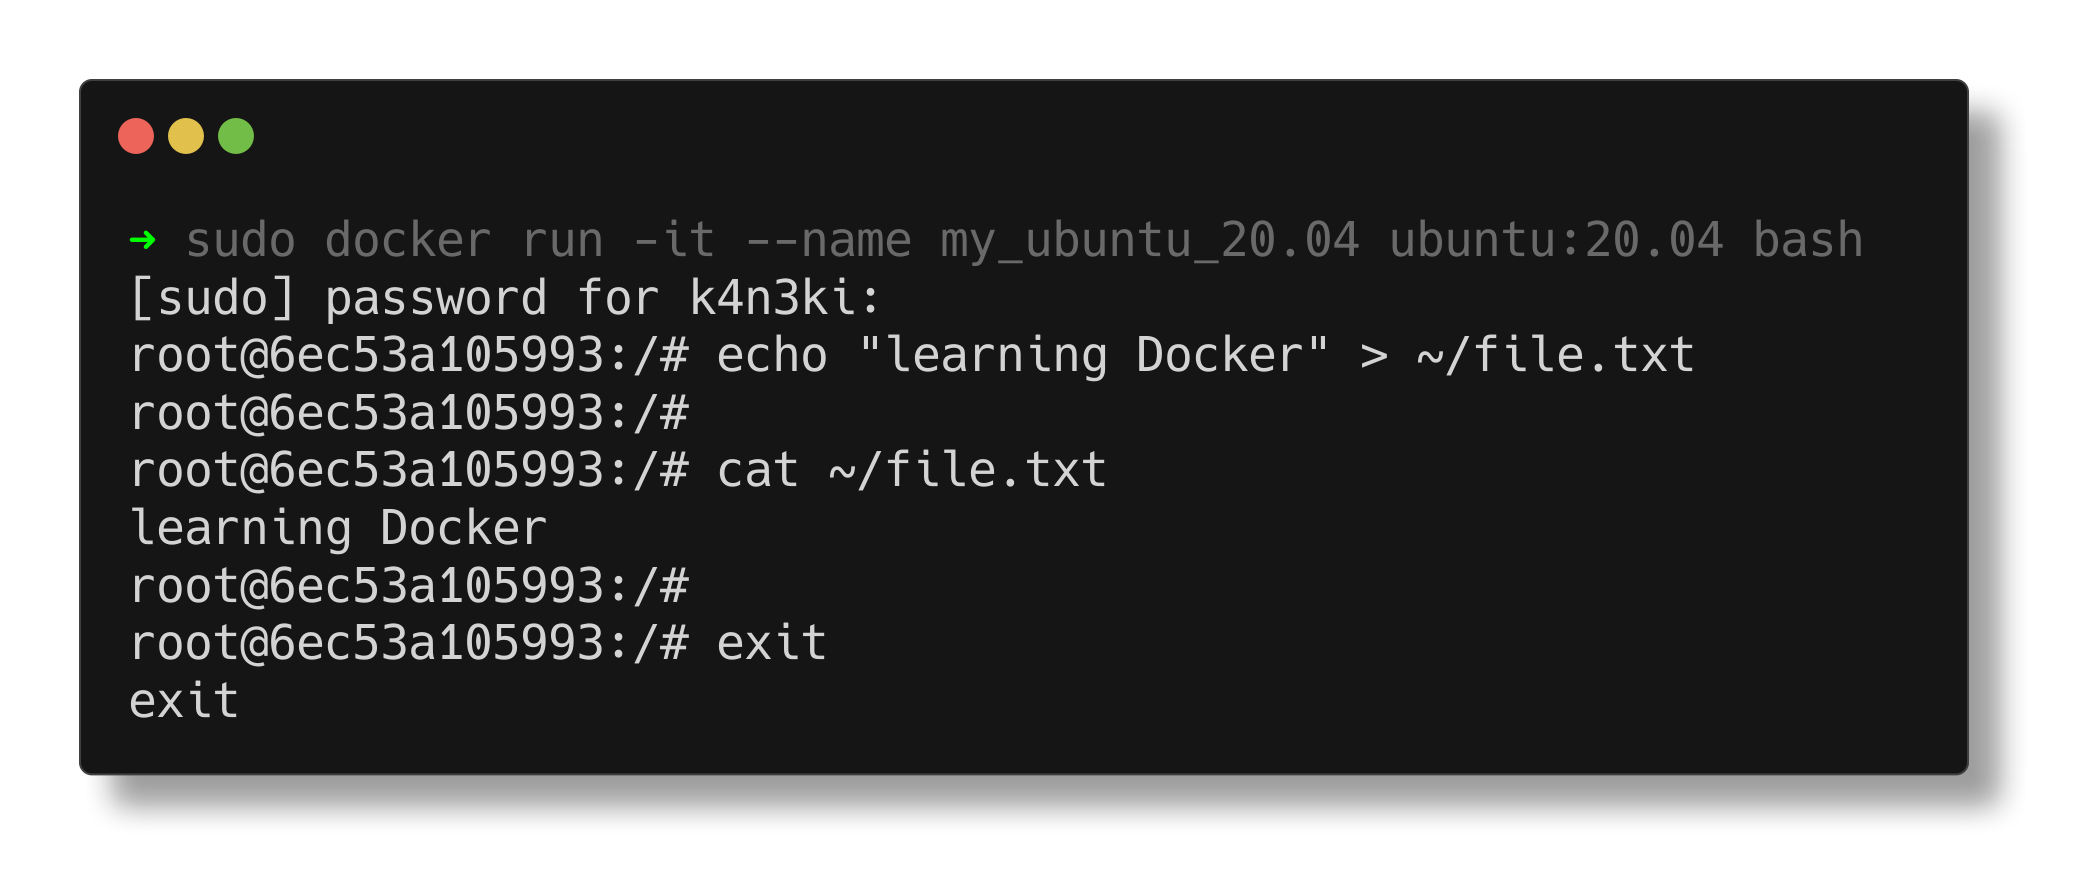
For example, suppose you had created a file inside the container before stopping it:
1
2
docker exec -it my_ubuntu_20.04 bash
echo "learning Docker" > ~/file.txt
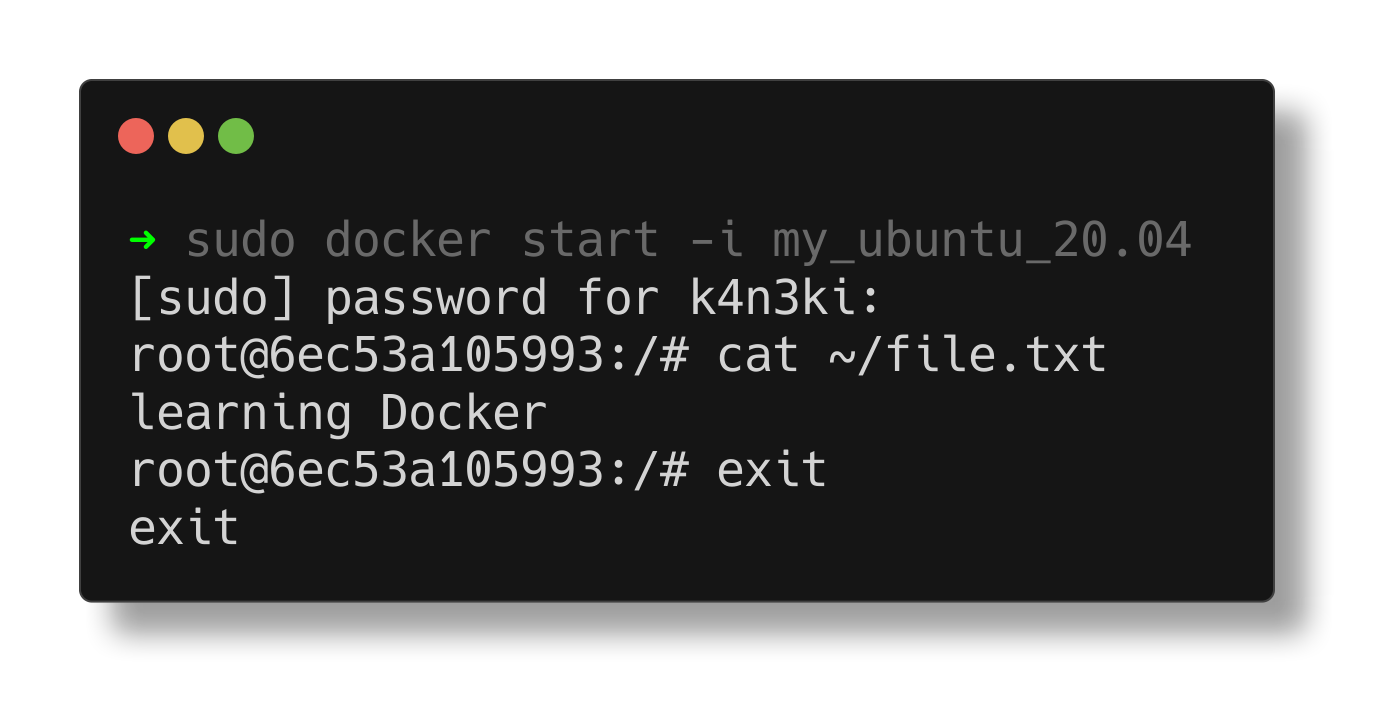
After stopping the container, you can resume it:
1
docker start -ai my_ubuntu_20.04
-a: Attach STDOUT/STDERR.-i: Keep STDIN open.
This brings the container back online with all its previously saved state.
docker rm
The docker rm command is used to delete an exited container from the local host. It requires either the container’s name or ID as an argument. Running containers must be stopped before they can be removed.
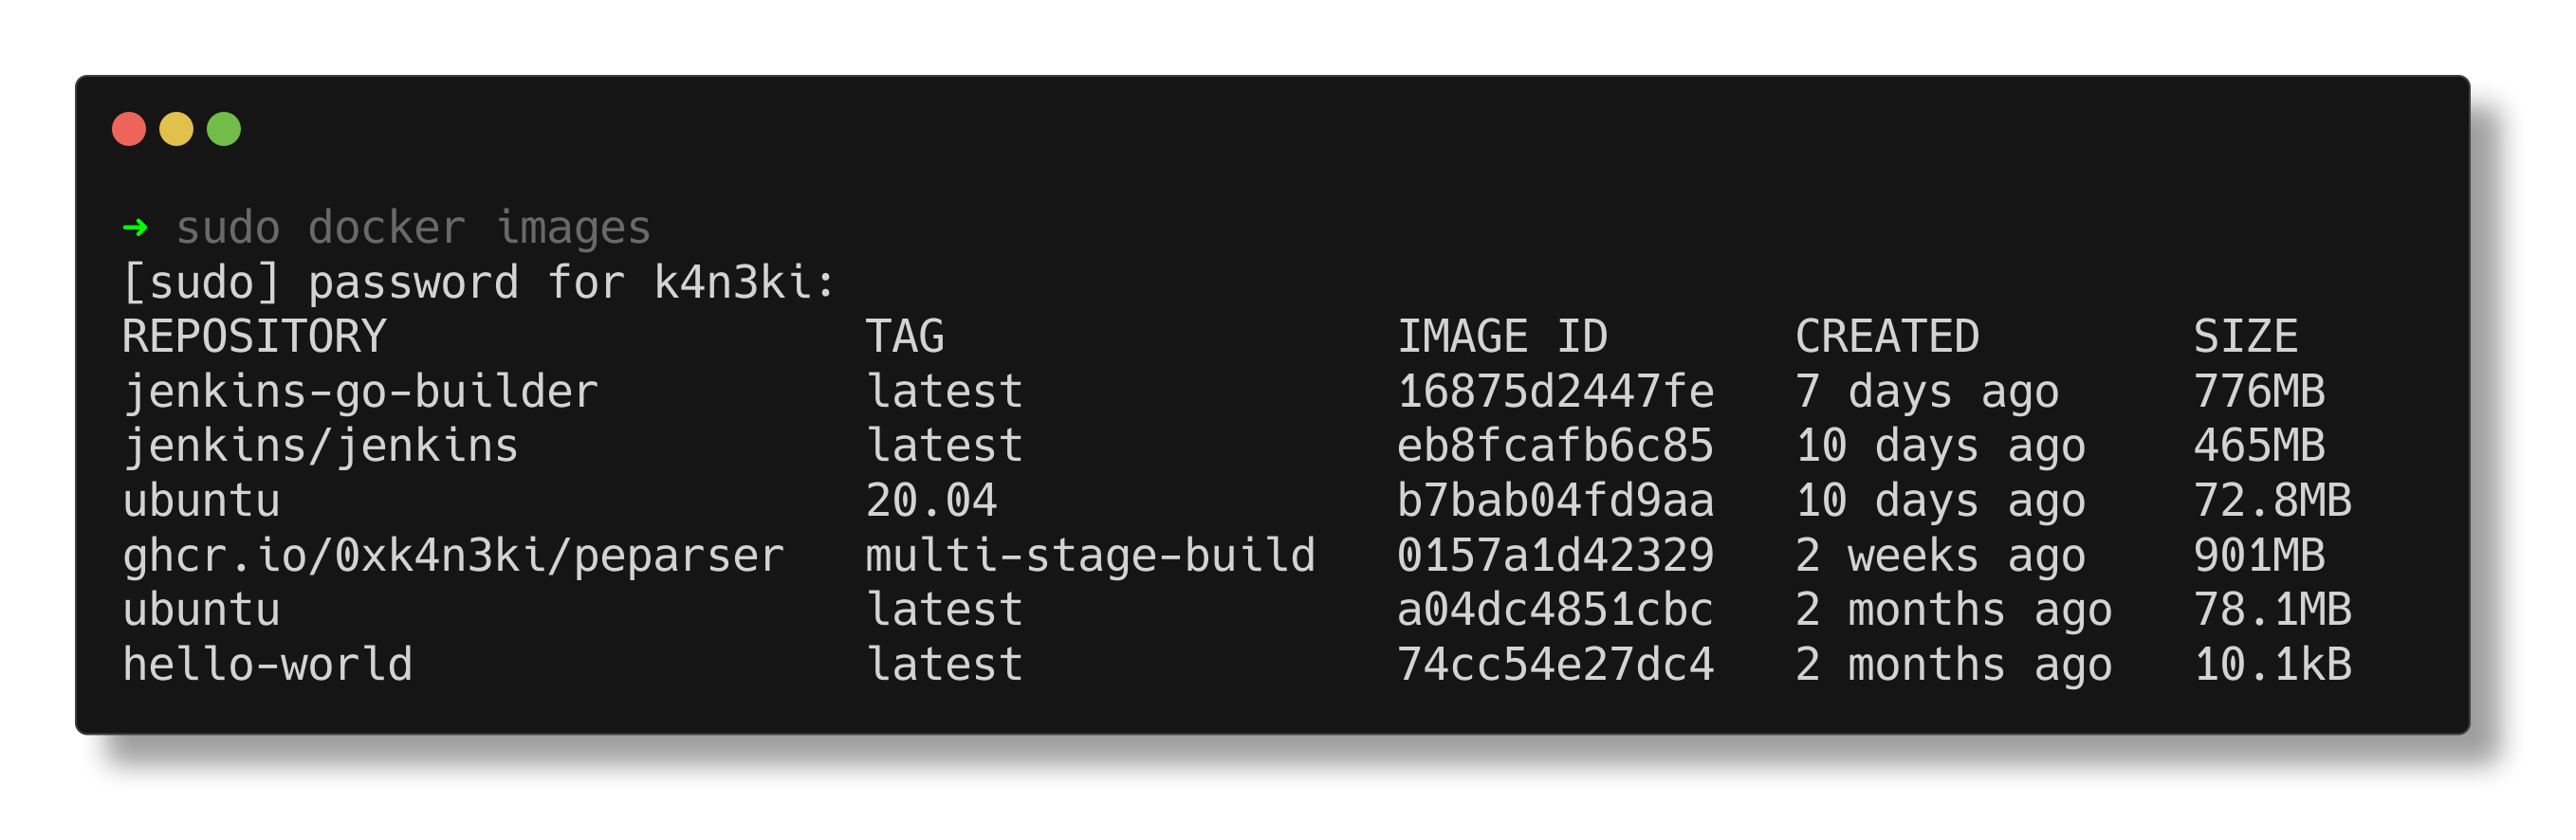
docker images
The docker images command lists all locally available images that have been pulled or built. The output includes:
REPOSITORY: Name of the image (e.g., ubuntu)TAG: Version tag (e.g., latest)IMAGE ID: Unique identifier for the imageCREATED: Time when the image was createdSIZE: Size of the image on disk
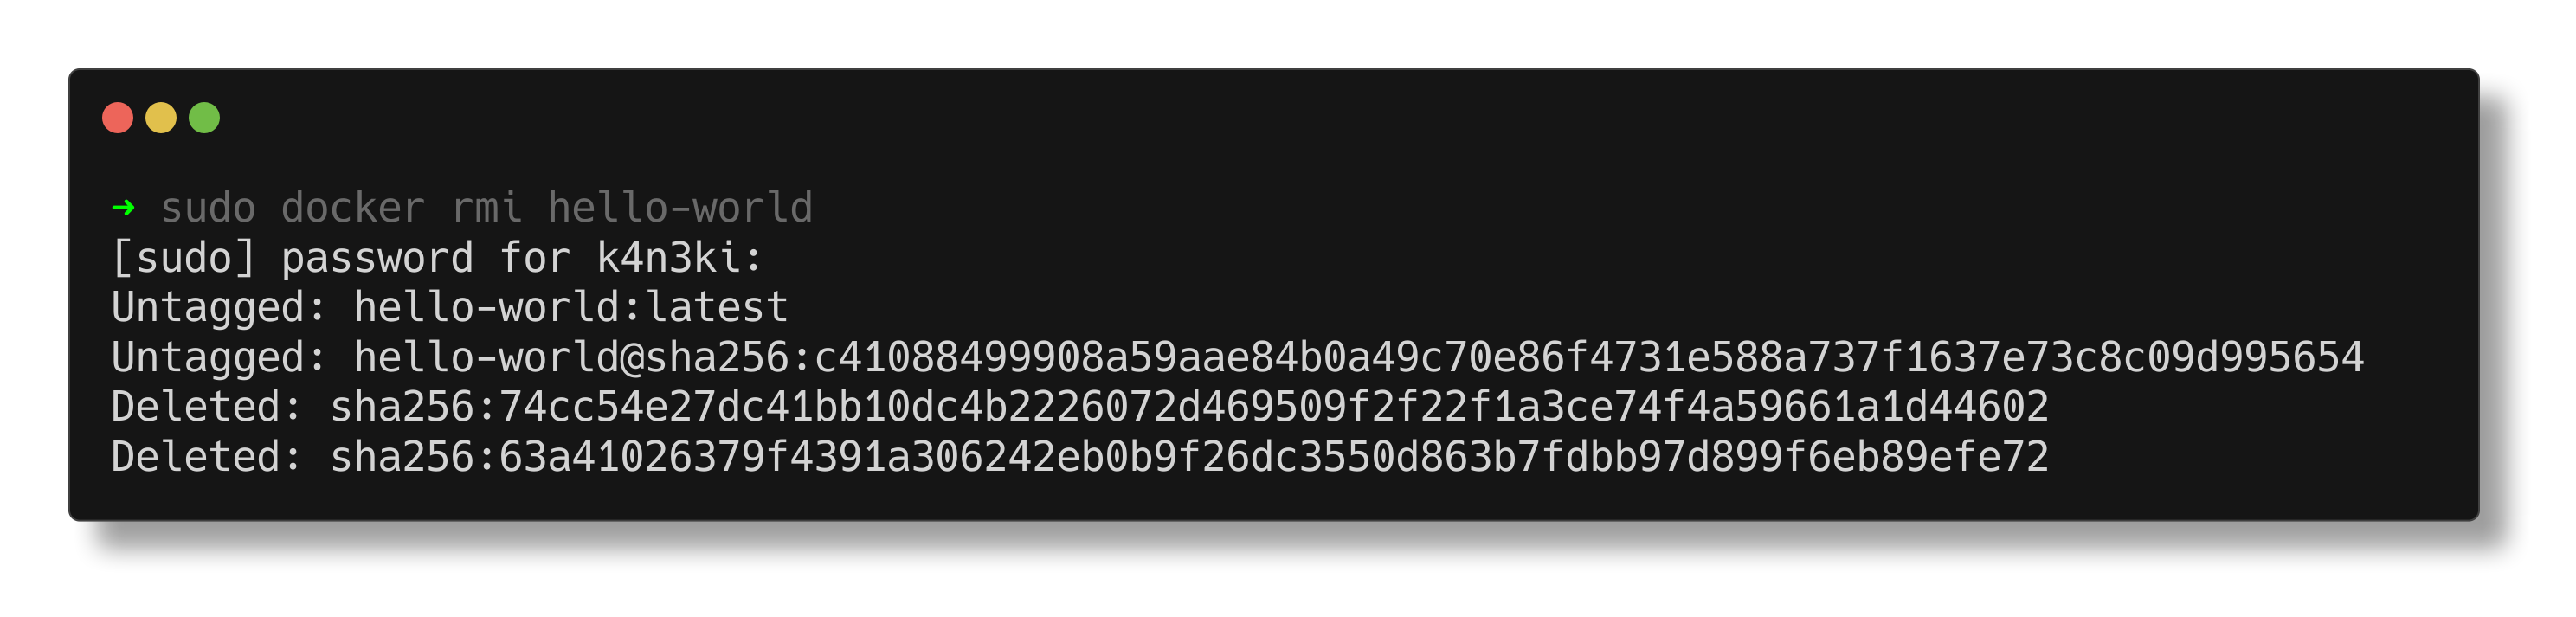
docker rmi
The docker rmi command removes a Docker image from the local system. It accepts either the image name with tag (e.g., ubuntu:20.04) or the image ID.
An image cannot be removed if any containers (even exited ones) still reference it. Those containers must be deleted first using docker rm.
docker pull
The docker pull command downloads a Docker image from a remote repository (e.g., Docker Hub, GitHub Container Registry) without running it. This is useful for pre-fetching images for later use or deployment.
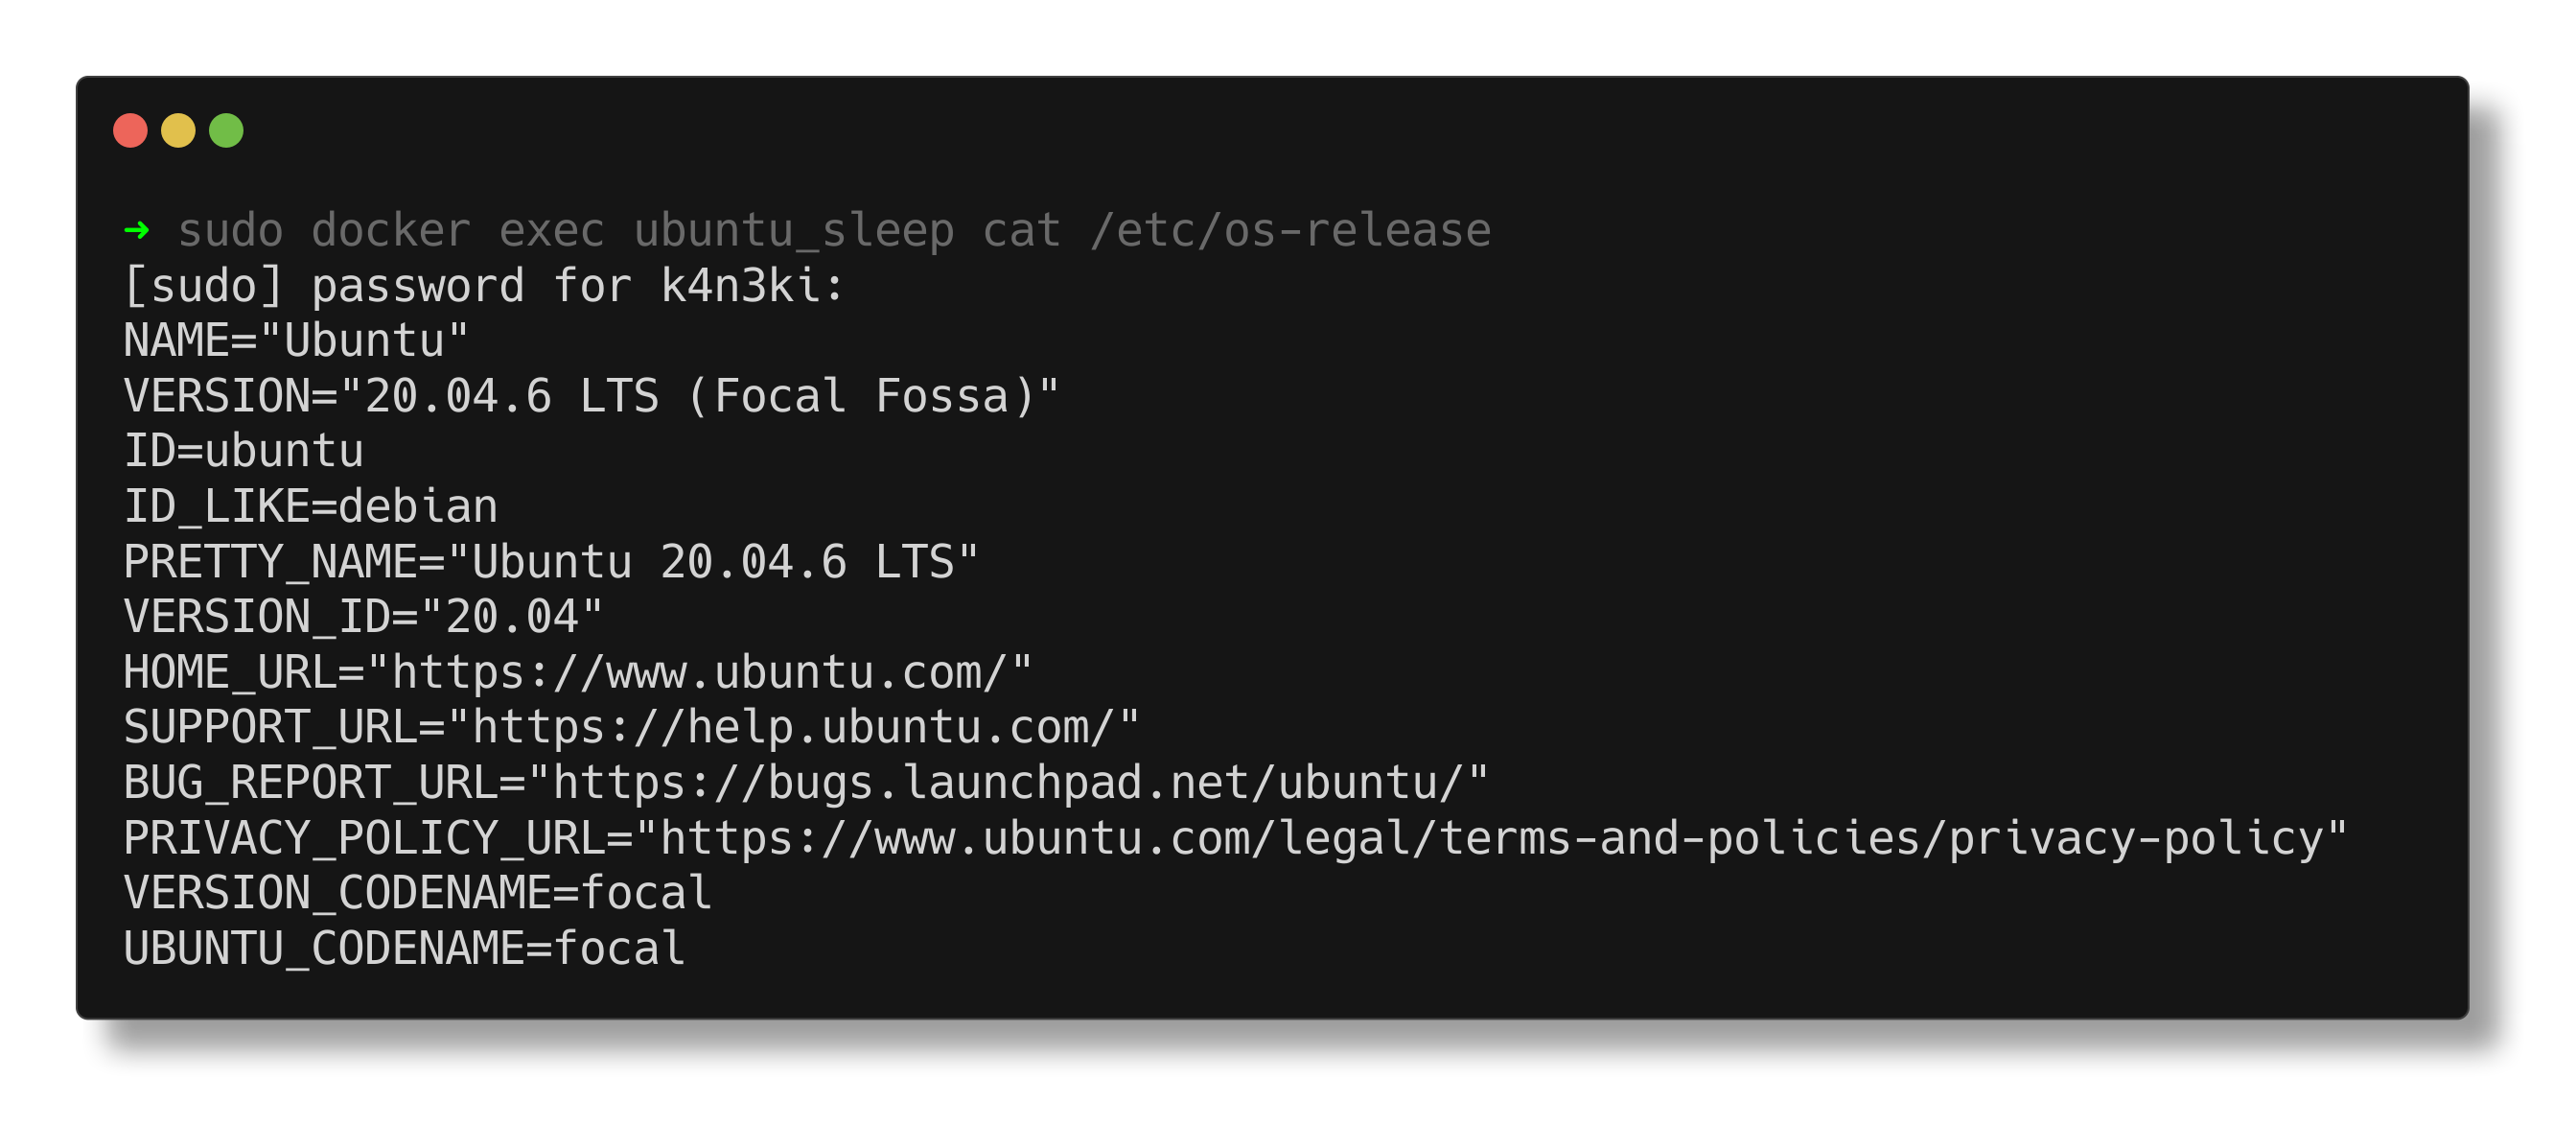
docker exec
The docker exec command is used to run a command inside an actively running container. It allows interactive debugging or inspection of container internals.
Example:
1
docker exec ubuntu_sleep cat /etc/os-release
This command prints the OS release information inside the ubuntu_sleep container.
Creating a Custom Docker Image
To create a Docker image, a file named Dockerfile must be created. This file contains instructions that define how the image should be built, including the base image, necessary dependencies, application files, and the command to execute when the container starts.
For demonstration, consider a basic Flask application that listens on port 8081 and returns a simple message:
1
2
3
4
5
6
7
8
9
10
from flask import Flask

app = Flask(__name__)

@app.route('/')
def home():
    return "Application inside Docker\n"

if __name__ == "__main__":
    app.run(host="0.0.0.0", port=8081)
To containerize this application, a lightweight Python image (e.g., python:3.9-slim) will be used as the base image. The Flask module must be installed, the application file copied into the container, and port 8081 exposed for external access.
The corresponding Dockerfile is:
1
2
3
4
5
6
7
8
9
10
11
12
13
14
15
16
17
# Use an official lightweight Python image
FROM python:3.9-slim

# Set the working directory
WORKDIR /app

# Copy the Flask app into the container
COPY app.py .

# Install Flask
RUN pip install flask

# Expose port 8081 to the host
EXPOSE 8081

# Command to run the application
CMD ["python", "app.py"]
To build the image, execute the following command in the directory containing the Dockerfile:
1
docker build . -t flask_app
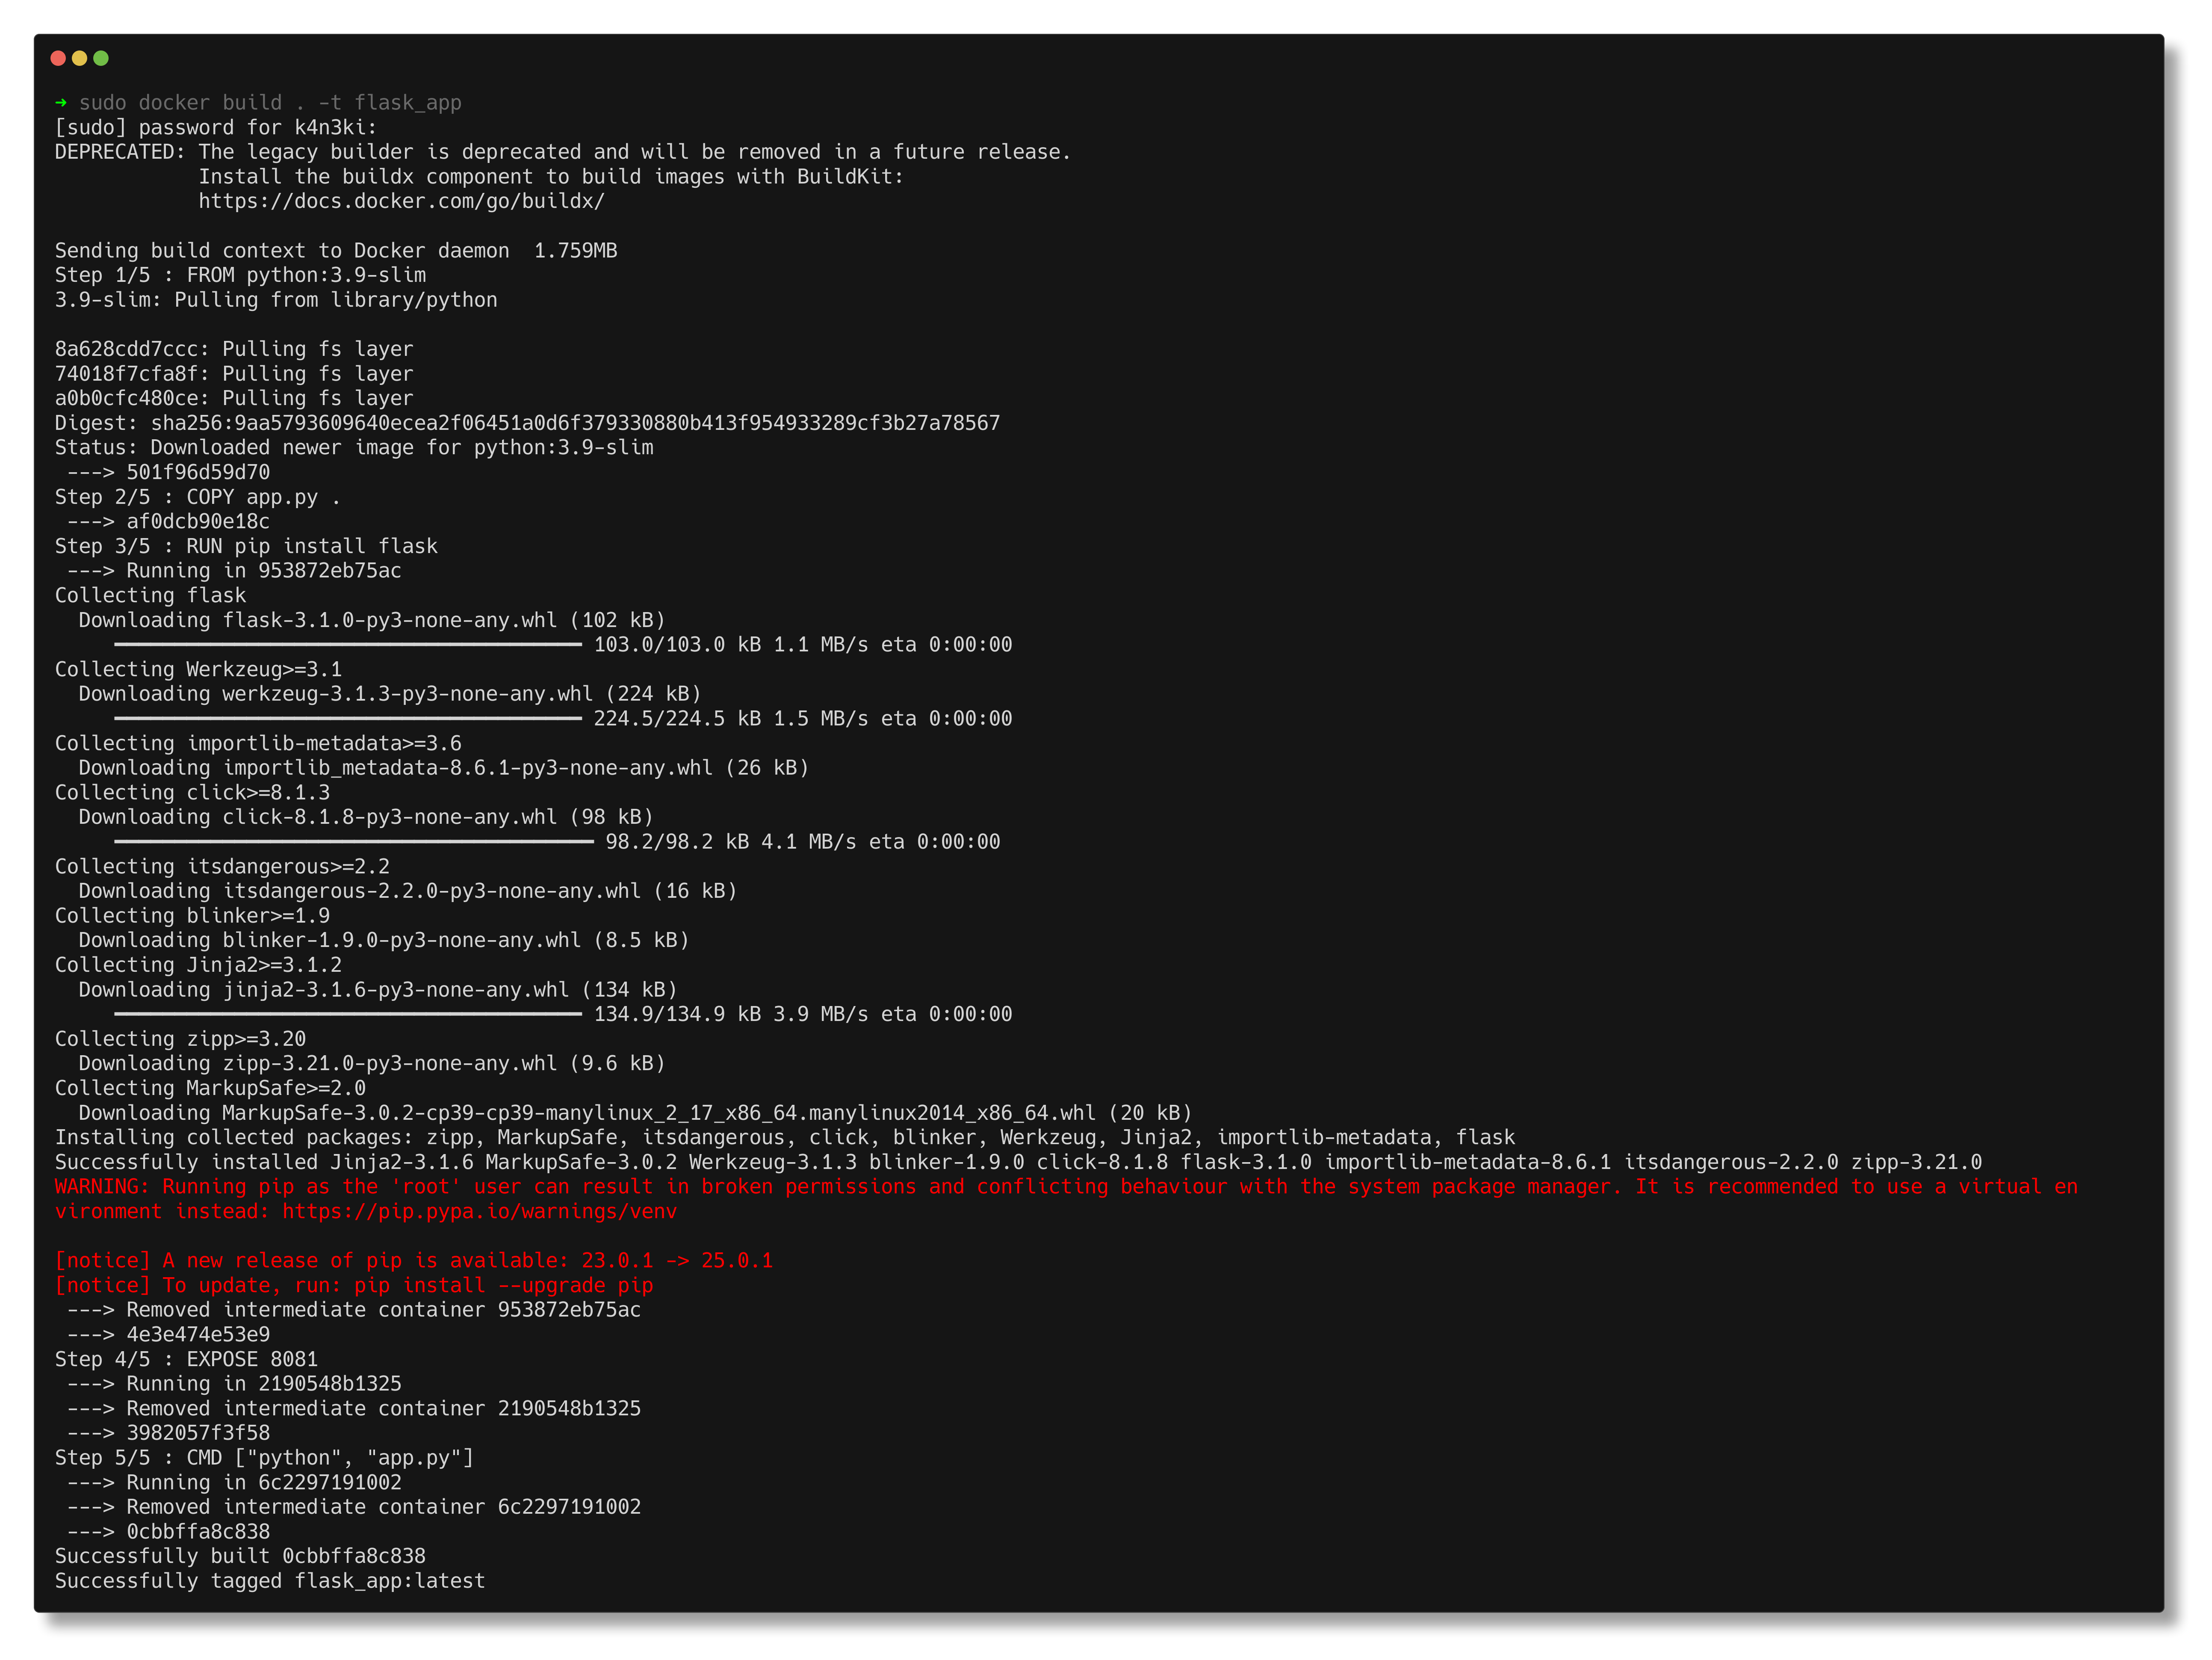
This command creates an image named flask_app.
Running the Custom Image
To run a container from this image and expose it on port 8081, use:
1
docker run -p 8081:8081 flask_app
- The -p flag maps the host port to the container port, allowing access to the application from outside the container.
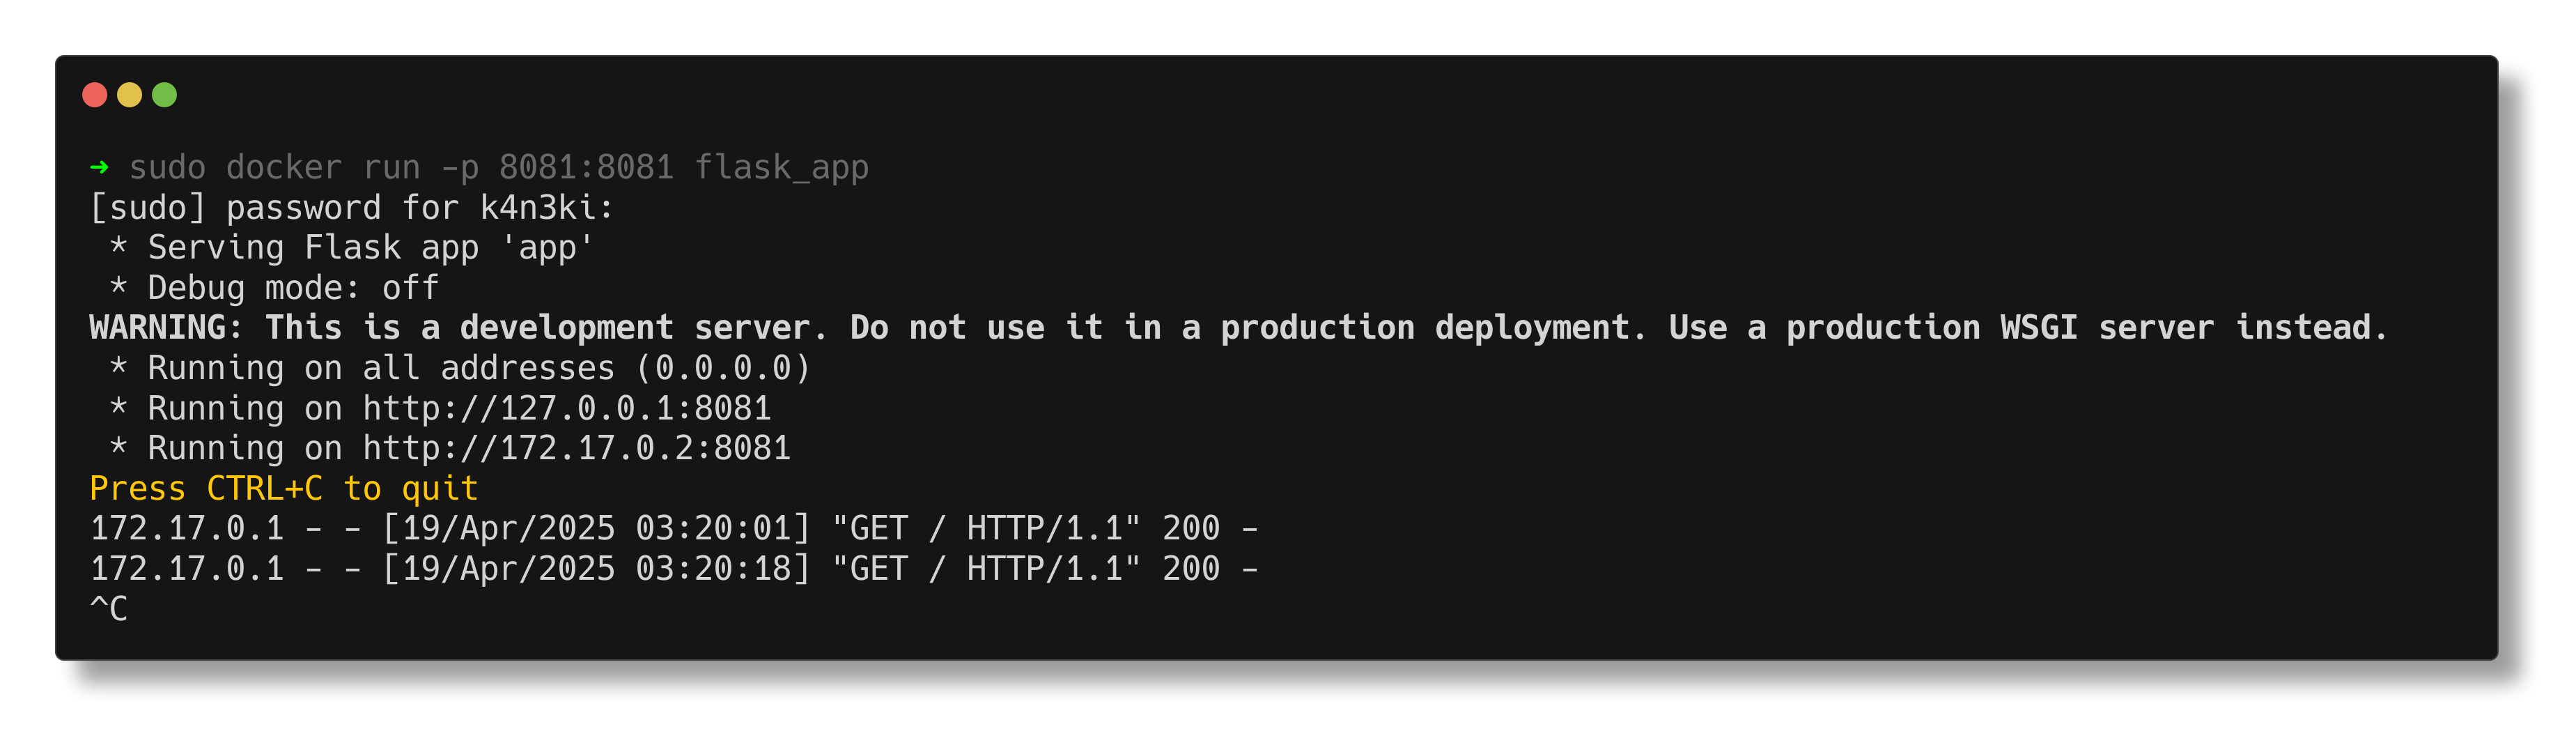
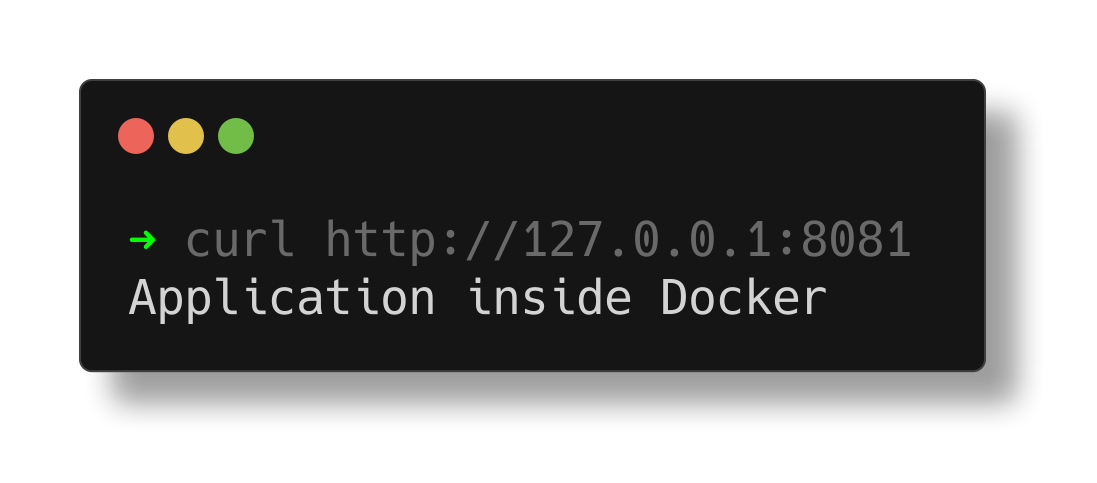
To verify that the containerized application is running, use a curl command or visit http://127.0.0.1:8081 in a web browser:
1
curl http://127.0.0.1:8081
now, for multistage and volume mapping, use the peparser image
Creating a multistage Dockerfile
The PEparser application, written in C++, analyzes 32-bit Portable Executable (PE) files. It uses the Windows runtime environment and requires Wine to run on a Linux-based system. The application is compiled using the mingw-w64 cross-compiler.
The compilation command used is:
1
x86_64-w64-mingw32-g++ PEparser.cpp -o pe.exe -fpermissive -Wint-to-pointer-cast
Initial Single-Stage Dockerfile (Large Image Size)
Initially, a single-stage Dockerfile was used to both build and run the application. This approach resulted in a large image size (approximately 1.5 GB) due to the inclusion of both build tools and runtime dependencies within the same image.
1
2
3
4
5
6
7
8
9
10
11
12
FROM ubuntu

RUN dpkg --add-architecture i386
RUN apt-get update
RUN export DEBIAN_FRONTEND=noninteractive
RUN apt-get install -y --no-install-recommends build-essential mingw-w64 wine64 && rm -rf /var/lib/apt/lists/*

COPY ./peparser.cpp /opt/peparser.cpp

RUN x86_64-w64-mingw32-g++ /opt/peparser.cpp -o /opt/peparser.exe -fpermissive -Wint-to-pointer-cast -static-libgcc -static-libstdc++

ENTRYPOINT ["wine", "/opt/peparser.exe"]
This Dockerfile installs both the compiler toolchain and the Windows runtime environment, even though only the latter is necessary at runtime.
Optimized Multi-Stage Dockerfile
To reduce image size, a multi-stage build was adopted. The application is first compiled in a build stage, and only the final executable is passed to a second, minimal runtime stage that includes Wine.
1
2
3
4
5
6
7
8
9
10
11
12
13
14
15
16
17
18
19
20
21
# stage 1
FROM ubuntu AS build

RUN dpkg --add-architecture i386
RUN apt-get update
RUN export DEBIAN_FRONTEND=noninteractive
RUN apt-get install -y --no-install-recommends build-essential mingw-w64

COPY ./peparser.cpp /opt/peparser.cpp

RUN x86_64-w64-mingw32-g++ /opt/peparser.cpp -o /opt/peparser.exe -fpermissive -Wint-to-pointer-cast -static-libgcc -static-libstdc++

# stage 2
FROM ubuntu

RUN apt-get update
RUN apt-get install -y --no-install-recommends wine && rm -rf /var/lib/apt/lists/*

COPY --from=build /opt/peparser.exe /opt/peparser.exe

ENTRYPOINT ["/usr/bin/wine", "/opt/peparser.exe"]
This approach reduces the final image size to approximately 901 MB. Further optimization is possible (e.g., using Alpine-based images with Wine support), but this serves as a substantial improvement.
Running the Container with Input Files
To analyze PE files located on the host system, volume mounting is required using the -v flag. This allows the container to access files from the host and persist any changes:
1
docker run -it -v <host-dir>:<container-dir> peparser_image
- The
-vflag maps a host directory to a directory within the container. - This enables the containerized application to read PE files from the host and write output or logs back to the mapped directory.
- Data stored in the mapped volume remains persistent even after the container exits or is removed.
Tagging and Pushing to Docker Hub
Tagging Docker images is considered best practice for purposes such as version control, image differentiation, and environment-specific deployments. Tags help track changes, manage multiple builds, and maintain clear documentation of an image’s purpose or state (e.g., development, staging, or production).
For example, in the case of the PEparser image, the following naming convention was used:
1
ghcr.io/0xk4n3ki/peparser:multi-stage-build
- ghcr.io: Specifies the GitHub Container Registry as the remote repository.
- 0xk4n3ki: The GitHub username or organization name under which the image will be hosted.
- peparser: The image name.
- multi-stage-build: The tag, which could also follow semantic versioning (e.g., v1.0, v1.1, latest) for clarity.
To push the image to the GitHub Container Registry, the following command is used:
1
docker push ghcr.io/0xk4n3ki/peparser:multi-stage-build
Before pushing, authentication with the container registry (in this case, ghcr.io) may be required. This typically involves generating a personal access token with the appropriate write:packages and read:packages permissions, then logging in using:
1
echo <TOKEN> | docker login ghcr.io -u <USERNAME> --password-stdin
If the image is to be pushed to Docker Hub, replace the registry URL with the Docker Hub namespace and ensure authentication using:
1
docker login
Tag the image accordingly:
1
2
docker tag peparser username/peparser:multi-stage-build
docker push username/peparser:multi-stage-build
Proper tagging ensures reproducibility, facilitates continuous integration workflows, and enables better organization of image versions across environments and platforms.
Common Issues and Troubleshooting
Docker daemon not running
Docker CLI commands require the Docker daemon to be active. If errors like Cannot connect to the Docker daemon appear, ensure the service is running using:
1
sudo systemctl start docker
Port conflicts
Running containers with exposed ports that are already in use can lead to binding errors. Verify which ports are open using netstat, lsof, or ss, and either free the port or run the container on a different one using the -p flag.
Container exit codes
Containers may exit immediately after starting if the main process ends or encounters an error. Check the container’s logs using:
1
docker logs <container_name_or_id>
Inspect the exit code using:
1
docker inspect <container_name_or_id> --format=''
Non-zero exit codes often indicate misconfigured startup commands or missing dependencies.
Conclusion
This guide covered the Docker installation, essential commands, image lifecycle, creation of custom application images, multi-stage builds, and pushing images to remote registries like Docker Hub and GitHub Container Registry.
Understanding these fundamentals enables smoother integration into real-world development and DevOps workflows. The next logical steps include:
- Using Docker in CI/CD pipelines
- Deploying containers with Kubernetes
- Exploring Docker Compose for multi-container applications
- Understanding Docker networking and volumes for stateful services
References / Resources
Docker Documentation
- https://docs.docker.com/
- https://docs.docker.com/desktop/setup/install/linux/ubuntu/
- https://docs.docker.com/engine/install/ubuntu/
Docker playground
Github container Repository
GFG flask app
Kodekloud Course